Every website should have a favicon. It’s very quick to add and it will help in making your website stand out and be unique. Nobody wants their website to look like a shallow clone.
It is very easy to add or change favicon in WordPress, and you don’t even need plugins.
What is a Favicon and what are the benefits
Favicons are known as the small icons displayed next to websites up in the browser’s tab, your browser bookmarks, mobile screen buttons and more.
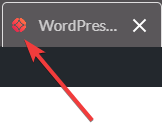
It is the icon your visitors will end up seeing in many places and is therefore important as it helps your site to be recognized and known, consolidate your brand and make it known everywhere. Soon, your icon will be shown on billboards! No, wait, that’s beyond our scope here, but any visitor can and should be able to associate your website with your favicon image.
Still, the benefits of adding a favicon are many and it is highly suggested adding one; it’s also quite easy, as we will see.
But wait, how do we create a favicon?
How to Create a Favicon
Before we place a favicon, we have to create one, unless we already have it.
Up until a few years ago, you had to use a specific .ico file for your favicon, created through a favicon generator. Luckily, nowadays all modern browsers support the use of PNG, GIF and also JPEG, so we do not really need to go through any process.
Most businesses and websites use their logo as a favicon.
Tips for Creating a Favicon
There are a few things to keep in mind when creating a favicon for your website, such as size and design.
The recommended size for a favicon is 512×512 pixels and while it is possible for it to be different or even rectangular, it is suggested to stick to this size, in order to avoid the image not looking alright.
It’s also important to note that in many cases the displayed size is 16×16 pixels, so it is also important for the image to not be very complex and to be clearly recognizable even as the tiny favicon that sits on the left of our page name in our browser’s tabs.
Take a look at many websites you normally use, you will clearly recognize them from their favicon.
So, use your favorite tool for handling images such as Photoshop or , create a 512×512 image of your brand icon, and you’re good to go.
In alternative, we can use RealFaviconGenerator to create our favicon. By using that website, we’ll be able to download a package of zip icon images created from our logo image, and we can use them to upload our favicon image.
How to add a Favicon to WordPress
Let’s get down to business! We’ll talk about 3 different ways we can create and upload our WordPress favicon, in detailed steps.
However, the first method is also the recommended one, as it’s built-in WordPress and it’s the easiest, fastest and most compatible way to add a favicon.
There are however situations where knowing about the other two methods could be helpful.
Without further ado:
1. Upload your Favicon via the WordPress Customizer
Since version 4.3, WordPress has the built-in feature to upload and set your favicon.
This is the recommended way to add it and it’s very easy to do so:
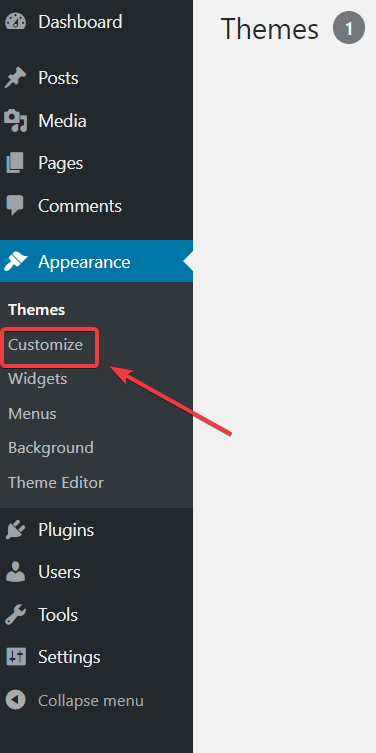
Once in the Customizer, go to Site Identity
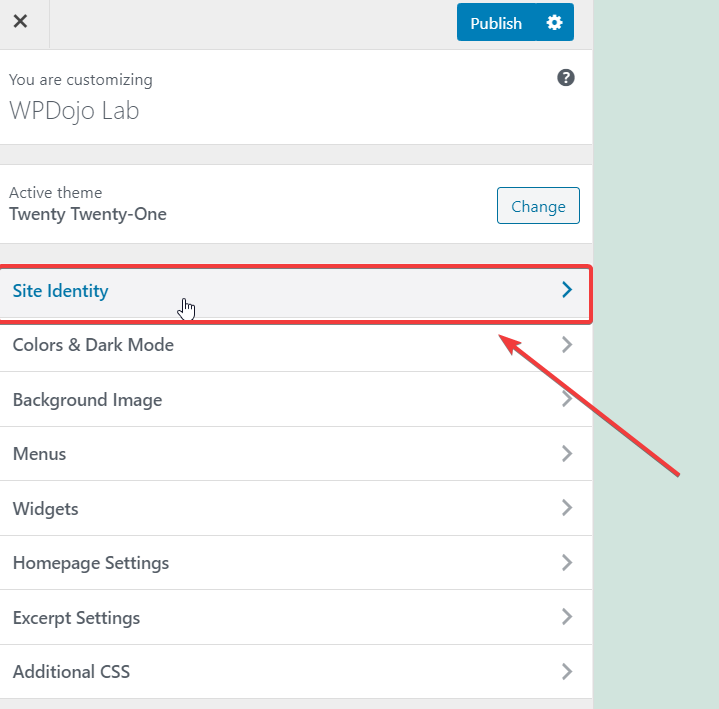
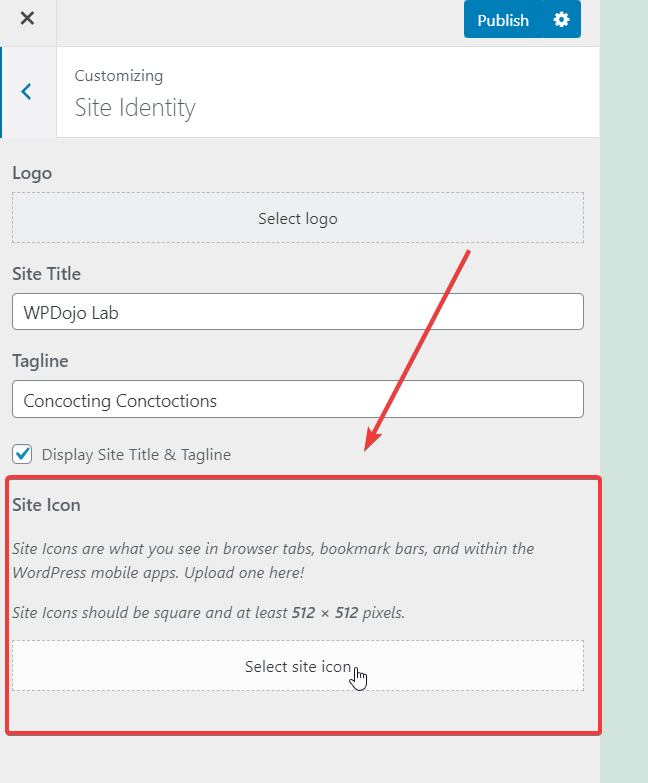
Once you’re there, simply upload your image and then press Publish. Your favicon should now be visible on your WordPress website!
While this is the recommended way, sometimes you cannot do this. Let’s check another method.
2. Setup your Favicon via a WordPress plugin
I know, I said no plugins are needed, and they are not. There are however favicon plugins that make this happen, so if your first method is not possible, it’s very easy to use a plugin just for this occasion.
Go to Plugins > add new and you can use Favicon by Realfavicongenerator. It’s free, has a lot of installations and seems to work properly.

After you’re done installing, go to Appearance > Favicon and you can set it up there.
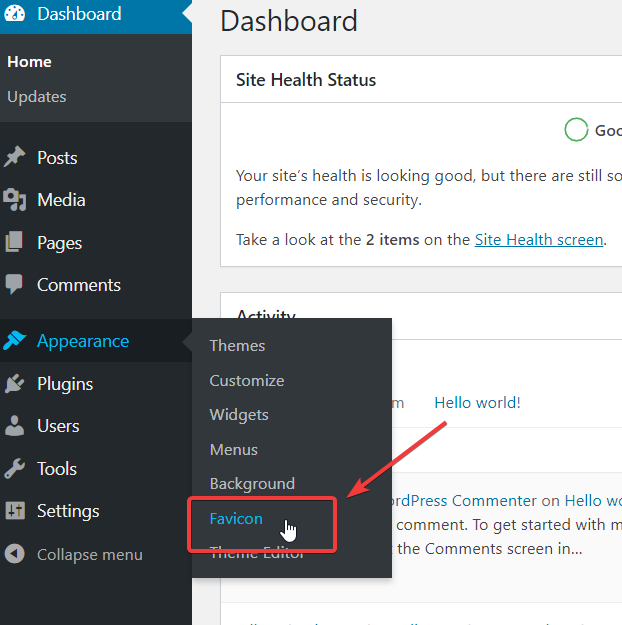
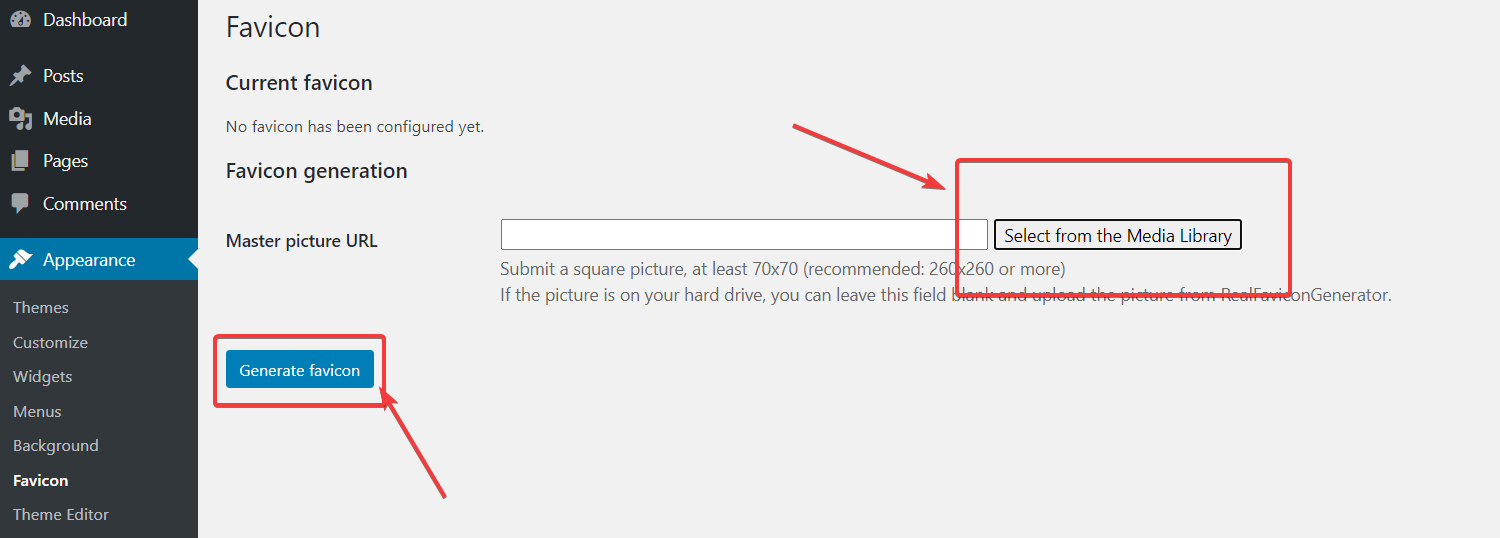
Once there, add your image via the Media Library, click Generate Favicon and you will be sent to their website for the favicon generation. Once there, click on Generate your favicons and HTML code; you will be taken back to your website and will see a preview of your favicon on different devices.
That’s it, you’re done! If you ever need to change it, you can do it from here.
3. Manually add your Favicon via FTP
Dear old FTP! If manual is the way to go, we can easily get it done this way as well.
First things first: We’ll need a favicon, and the RealFaviconGenerator bundle is especially useful here.
Once we have a favicon, we have to connect to our WordPress website using a FTP Client. Once we do so, we can upload the contents of the zip in the WordPress root folder.
As that’s done, we need to add the snippets that we’ve received from the RealFaviconGenerator website to our website: we can use any plugin in order to add this code permanently, such as Insert Headers and Footers, Code Snippets or Advanced Scripts (favorite of mine, paid).
How to Change WordPress Favicon
You don’t really need to do much. Just use the previous method to change image. If all you did was go through your WordPress Customizer to change favicon, then all you need to do is go there again and change your image with something else, then hit Publish.
Additional Tips
If you use a CDN and configure it properly, your favicon will be picked up, so your favicon will be served quickly by the CDN itself.
Remember to change your favicon if you change your website logo
If you don’t immediately see results, it’s likely you are using one or more caching layers: either flush your cache or wait for it to refresh.
Conclusion
While it’s easy and quick to create and upload your favicon to WordPress, it’s also very important as a way to distinguish your website and we highly suggest anyone with a WordPress website to do it.
We hope you’ve liked this article, and let us know in the comments about any feedback or further issues. Follow us for more tips on WordPress.

